Friday, April 19, 2024

A little birdy told me...

 Greetings everyone! It's me again, Jessie Scott (@chevy.scott on IG), Guest Designing for Gerda Steiner Designs!

Today I am playing with this super versatile new digi stamp, Happy Birthday Birds - Print & Color Greeting Card. Don't let the name fool you, the digi also comes with a blank sign image so you can do what I did and make your own messages!


The beauty of digital stamps is you can do the same or even more than using a real stamp! This digital stamp set comes with a "PNG" version that has transparency that allows you to layer it onto other images. For this card, I layered on itself to create a scene of a group of birds in the trees.
   
Have you ever used a mirror technique to "flip" a stamp? It's so much easier with digital stamps! I used two original images and then flipped the image horizontally twice as well to make this scene.

You can use an advanced editing program if that's what works for you, but I use just simple MS Word.


I like to use the "insert - shape" option to make a card front shape to size my images before printing. This one was sized for a minislim 5.25"x3.5". I then added some heart shapes in the empty spots and my text in the signs.

Now for the fun part! Coloring! Yes... I blended the ENTIRE background! It took a few layers to get it to this point, but worth it. Then I colored the trees.


I keep seeing the fun pastel colors for the birds and couldn't resist using them as well. I took some glitter paper and used a starburst punch to make a sun rising on my adorable morning birds. I coated the hearts with glue and covered them in glitter for a final touch.

I hope you enjoy the card and maybe have a little more understanding of how to use digi stamps and join in on the fun!


Here's the finished project!


See you again soon!

Monday, April 8, 2024

And all the little birdies went "tweet, tweet, tweet!"

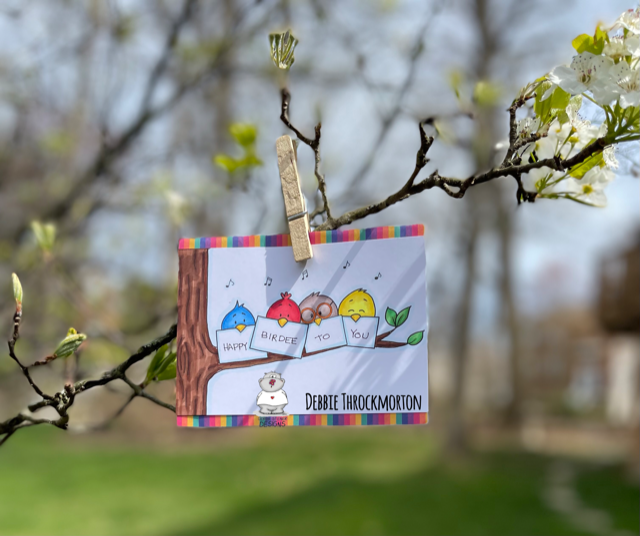
Back again for another outing with the sweet little bird quartet in the latest GSD digital stamp-Happy Birthday Birds.  These little cuties are so much fun to play with and they are really quick to color up, which is great, if you need a card in a hurry.


This time I used the full-size digital image with the blank signs, cutting off a bit of the top and bottom, so I could add a splash of color with a little bit of border.  And once again they insisted on going outside to have their picture taken!!


The birdies can be any color, but I stuck with my favorite birds.  And of course you can color in the background, but I didn't want to take anything away from these sweet little birds and the message they were sending, so I chose to just outline the tree, birds and musical notes with light blue.

Bluebird:  FB2, B24, B32

Cardinal:  R29, R27, R35

Robin:  E74, E71, E70, glossy accents used on the spectacles

Goldfinch:  Y08, Y15, Y06

Beaks:  Y17, Y15

Tree trunk:  E29, E59, E27

Outlining:  B00

These little birds are sure to delight everyone.  They really are just "so tweet." 


Have fun and happy crafting~Debbie


Friday, April 5, 2024

YOU ALWAYS MAKE ME SMILE


Hello all you creative minds, 
Nicole here again from Hamburg/Germany.

Today we're going underwater and meeting some friends from the stamp set "A Whale of a Time".


For an underwater shaker card I used a great design paper from Whimsy Stamps "Under the Sea".

First I punched out the design paper with the punching template.


Then colored the stamp impressions with the markers from Ohuhu.
Color combination:

Waale: MG020, MG030, MG060, MG100

Octopus: GY7, G260, G270, G470, G080

Cheeks: R120, R188

And then cut out.


Before you glue the windows of the card, you should consider positioning the cut-out backgrounds on the base card. I tend to forget that from time to time!😉

Then you can fill the shaker elements into the squares and apply the front card with 3D tape.


I embossed the stamp text with WOW embossing powder/white and then attached it to the card with the cute friends.
In the beginning I always thought shaker cards were too much work, but once you understand the system, you can turn all the punching templates into a great and effective shaker.


For more inspiration, come and visit me on Instagram under "Stempelfiziert".

I would be delighted to help you.


 I hope you enjoyed my post and that it has inspired you a little.


See you soon 

Nicole aka Stempelfiziert